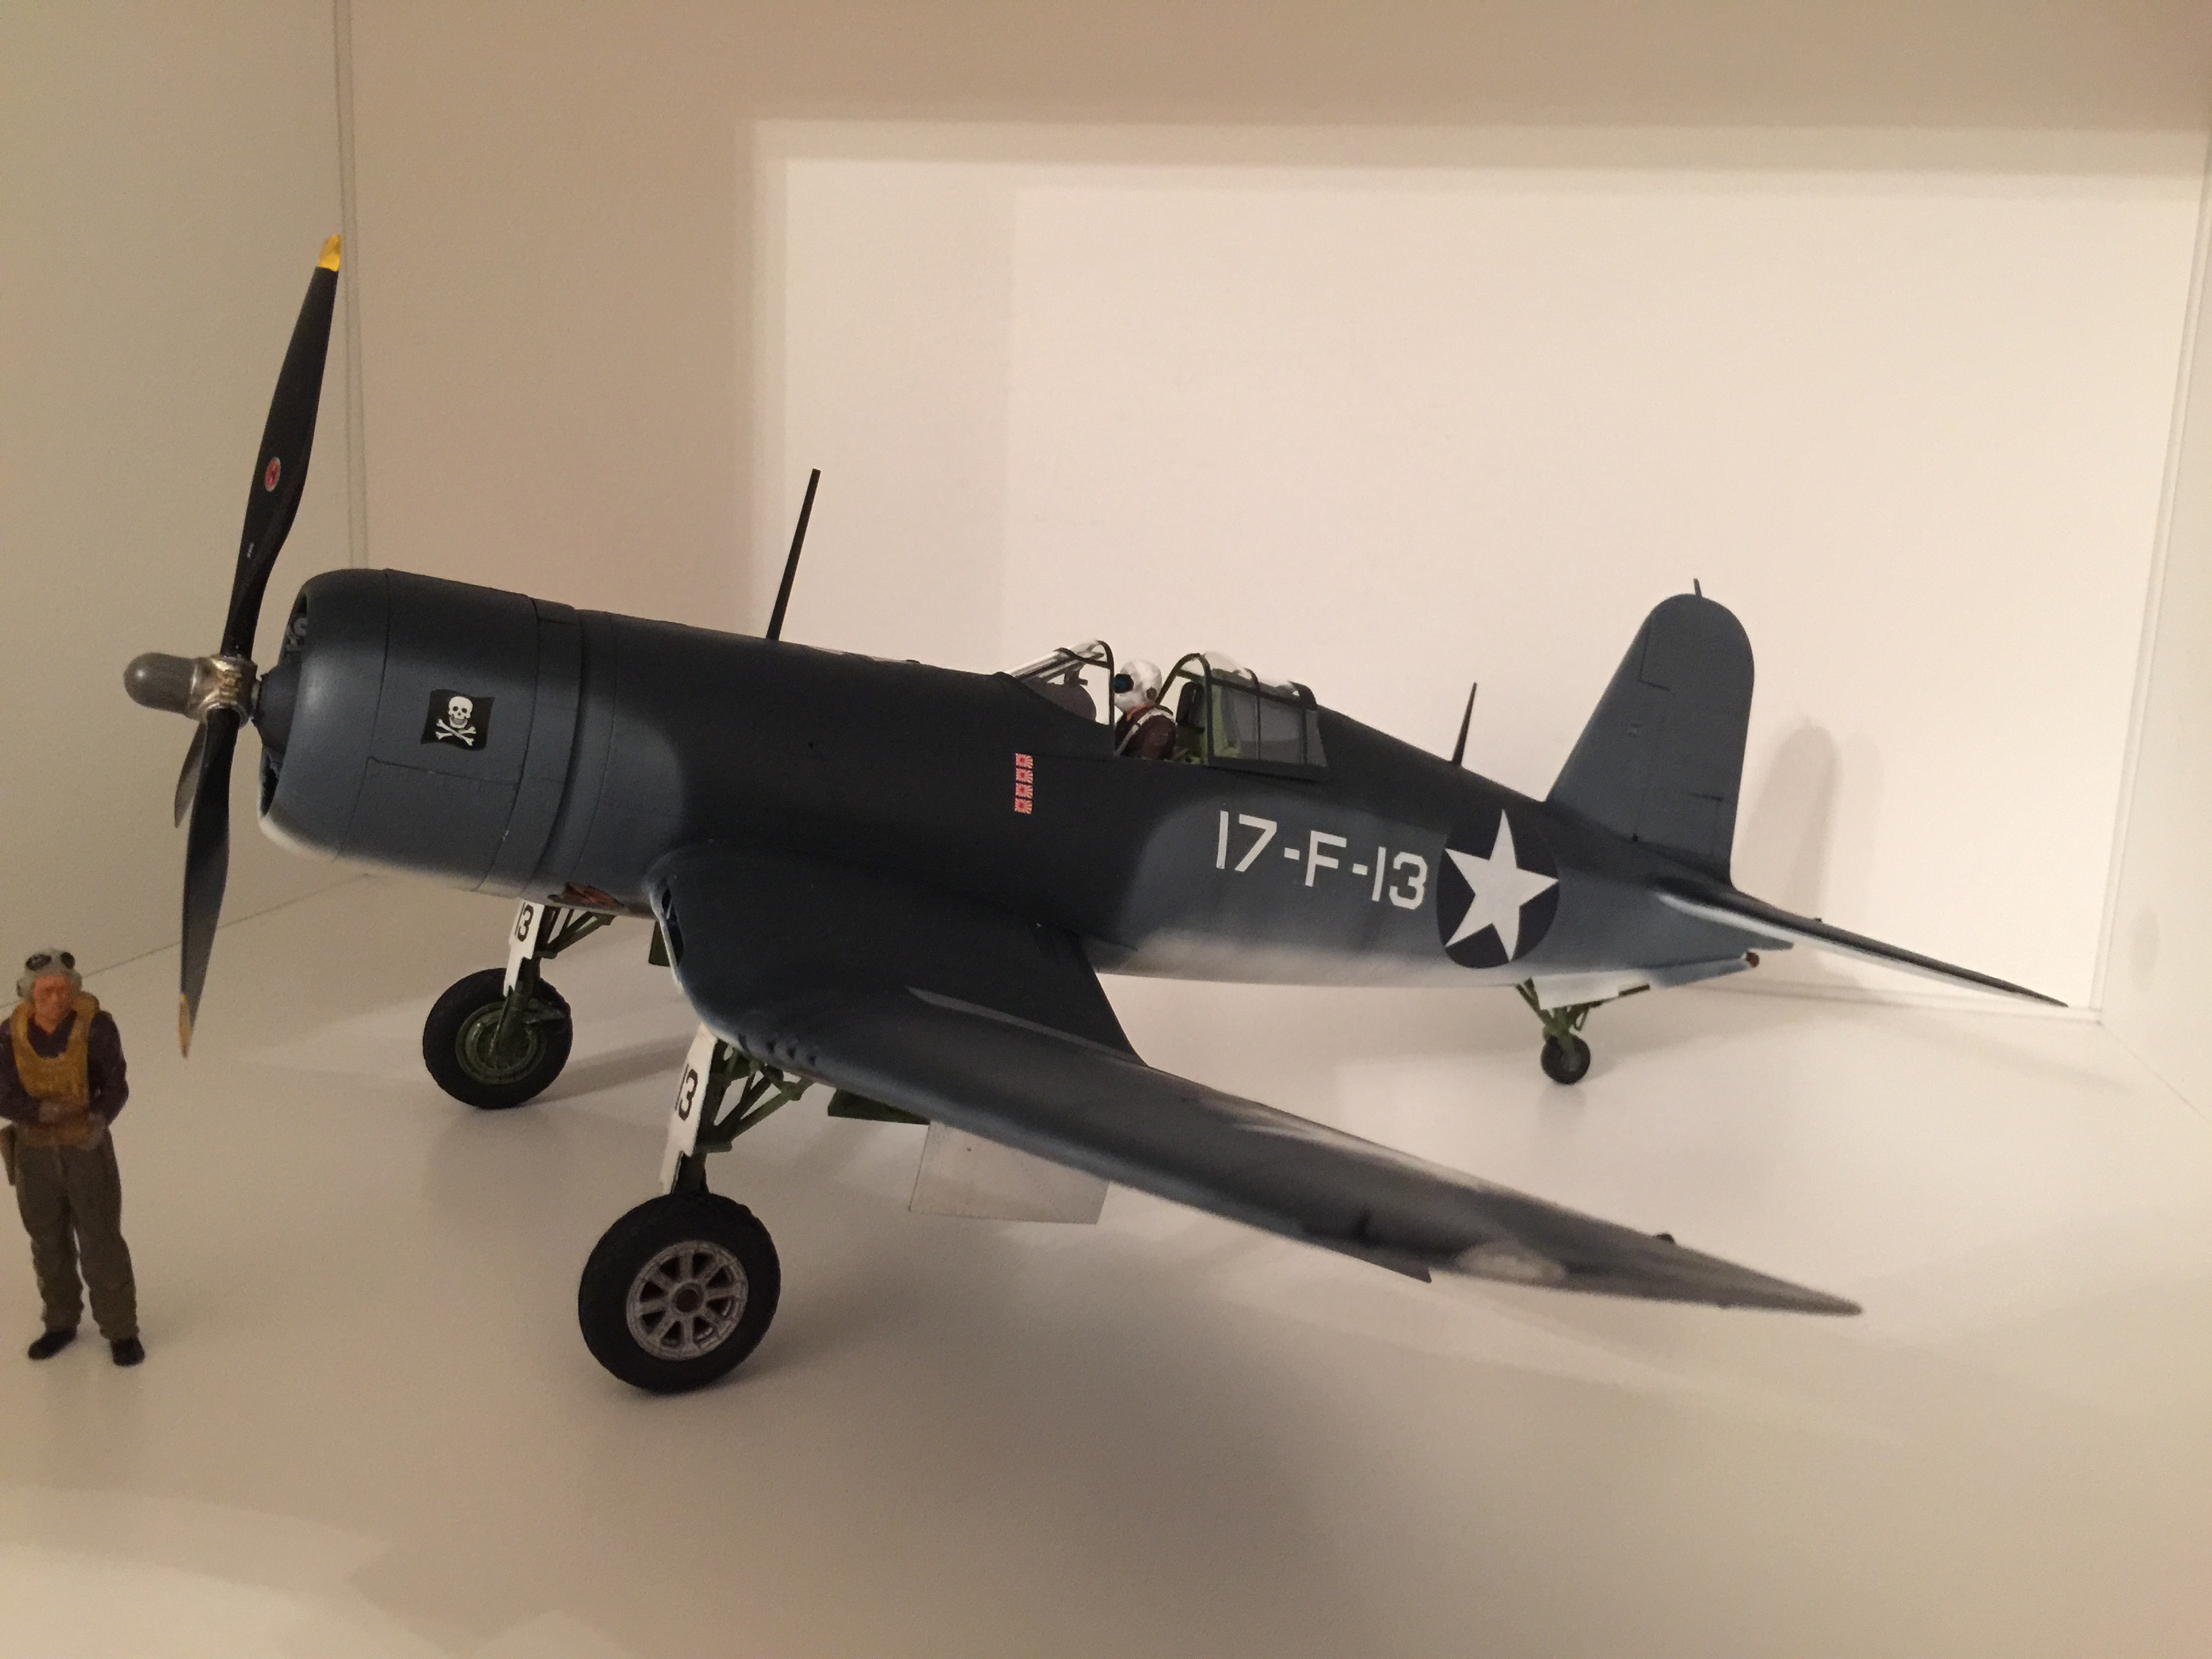
This is an amazing kit, perfect fit on all the pieces and a high amount of interior and exterior detail. Unfortunately, most of the beautiful cockpit detail can’t be seen unless you have a lighting system in your display stand. Although it is quite an expensive kit coming in at over 80 British pounds, it is definitely worth it and is a pleasure to build.
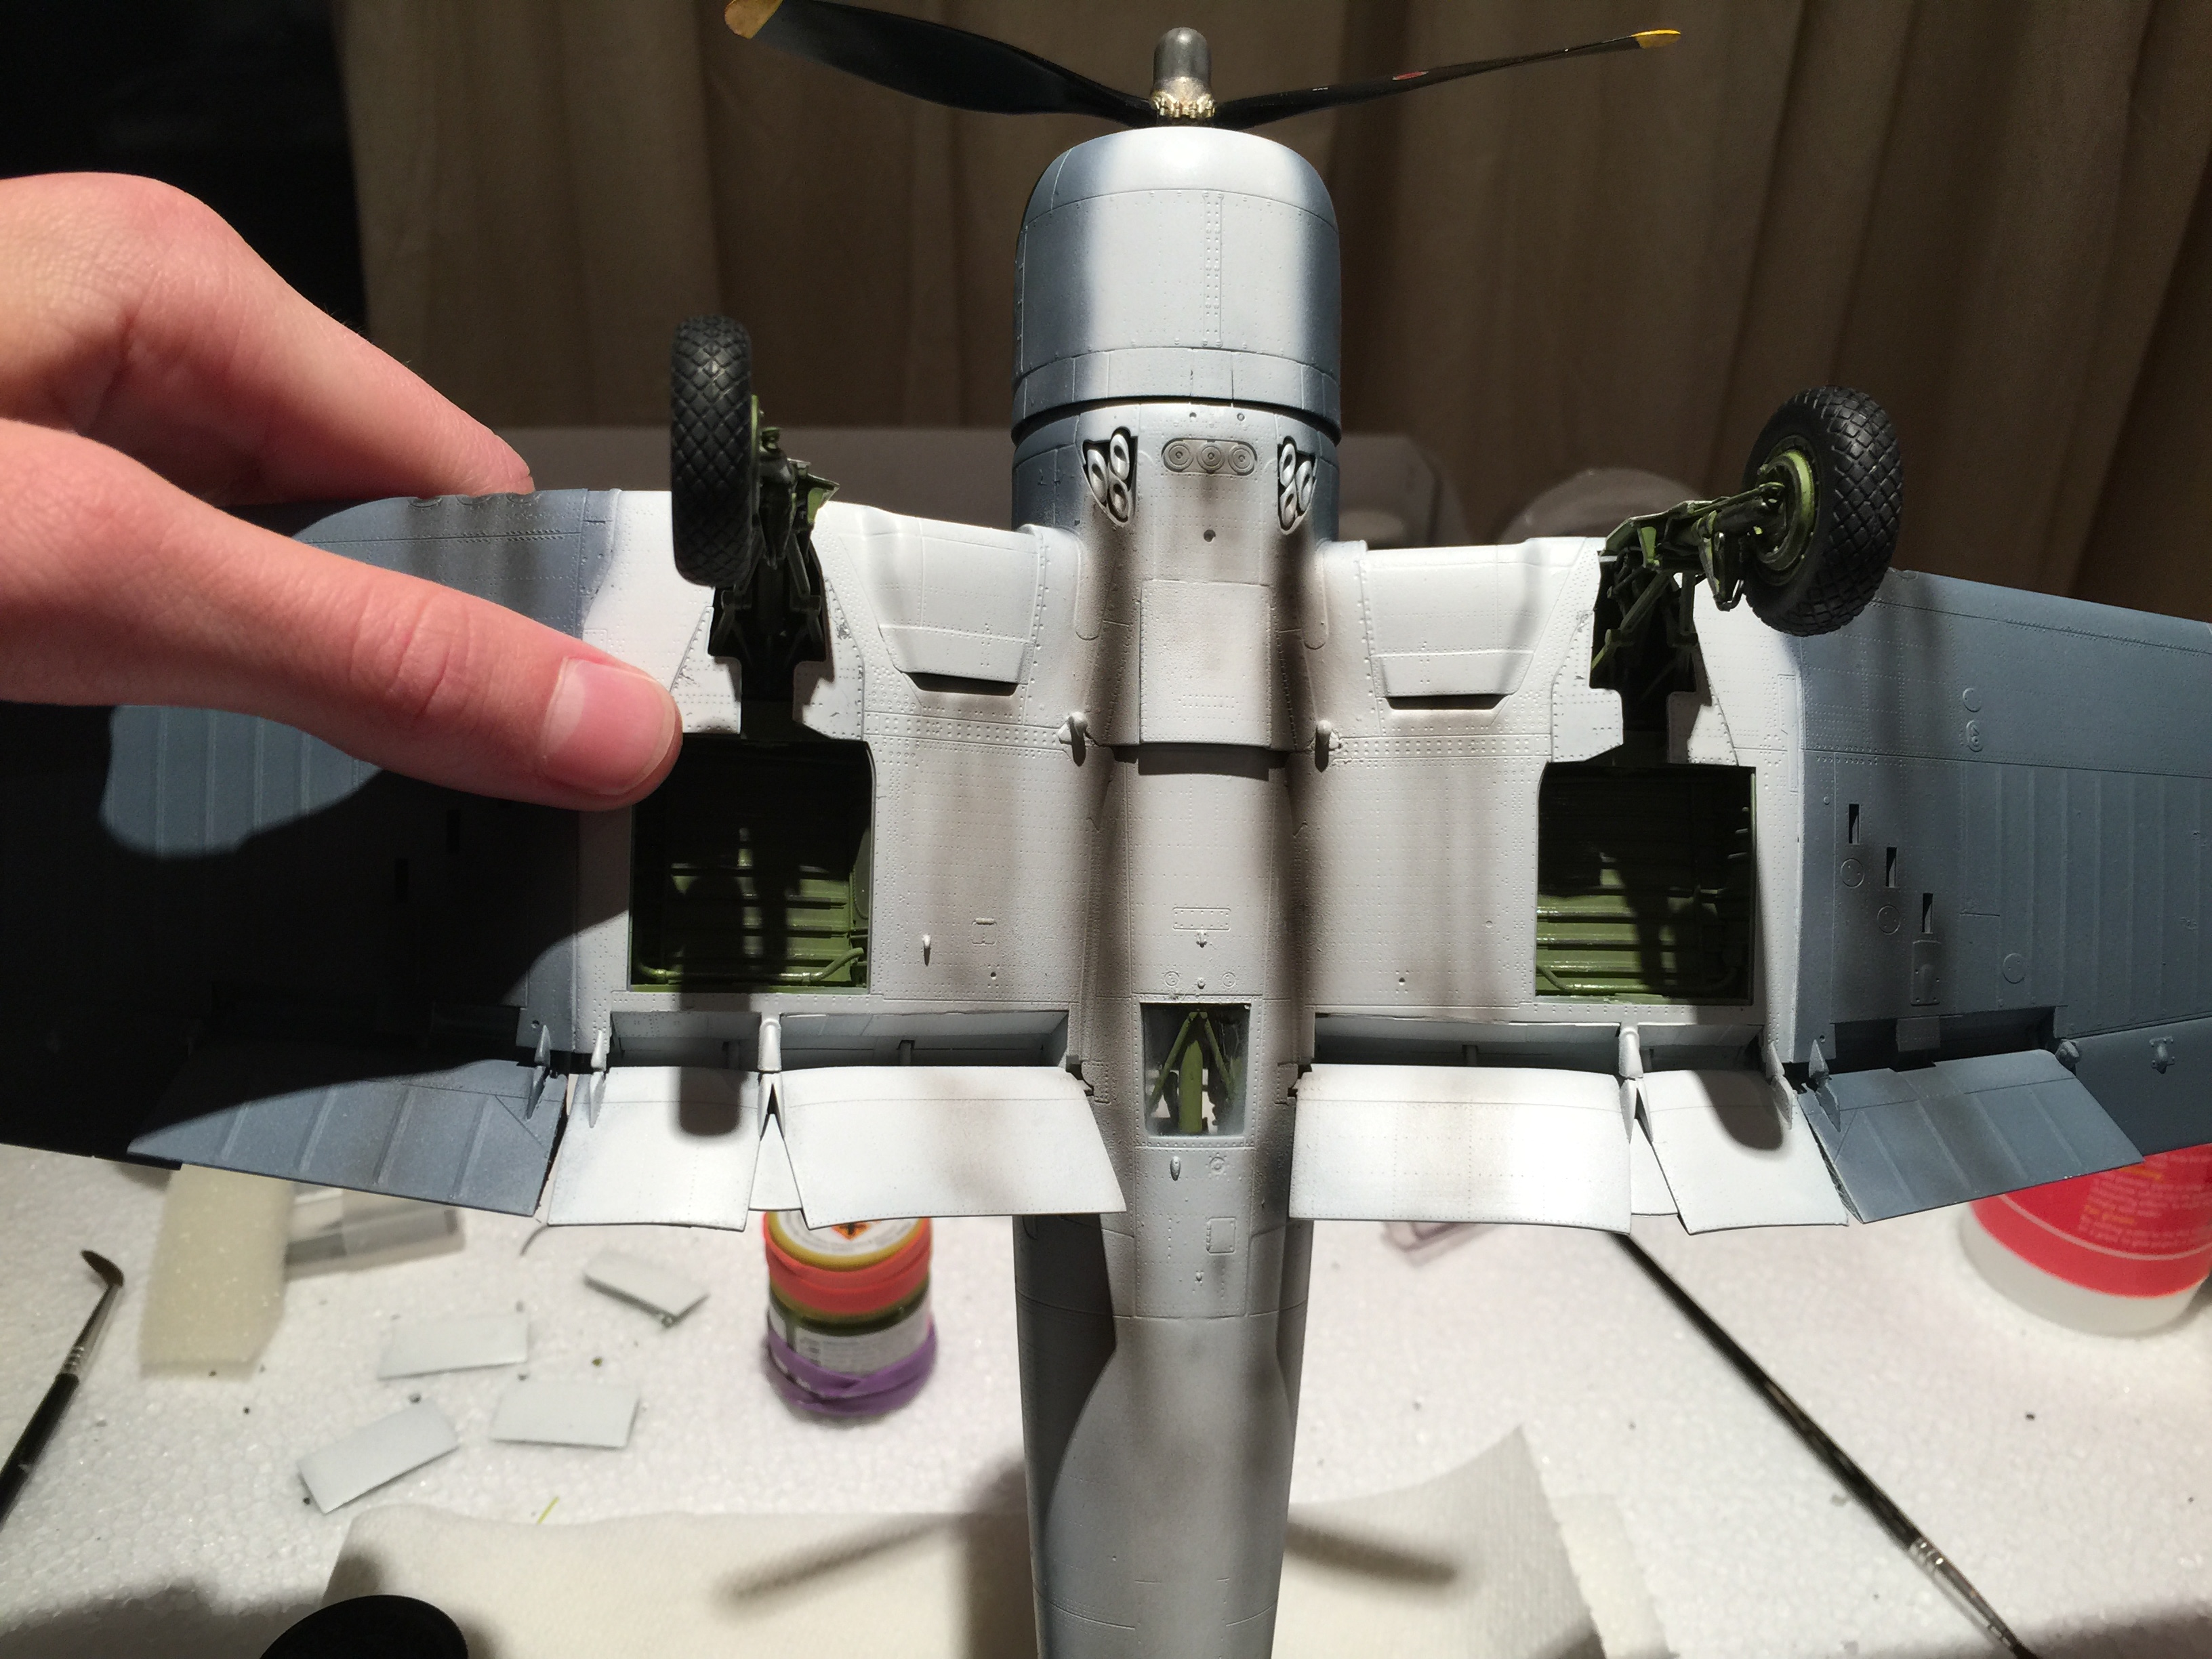
The landing gears are made of rubber which adds a realistic finish

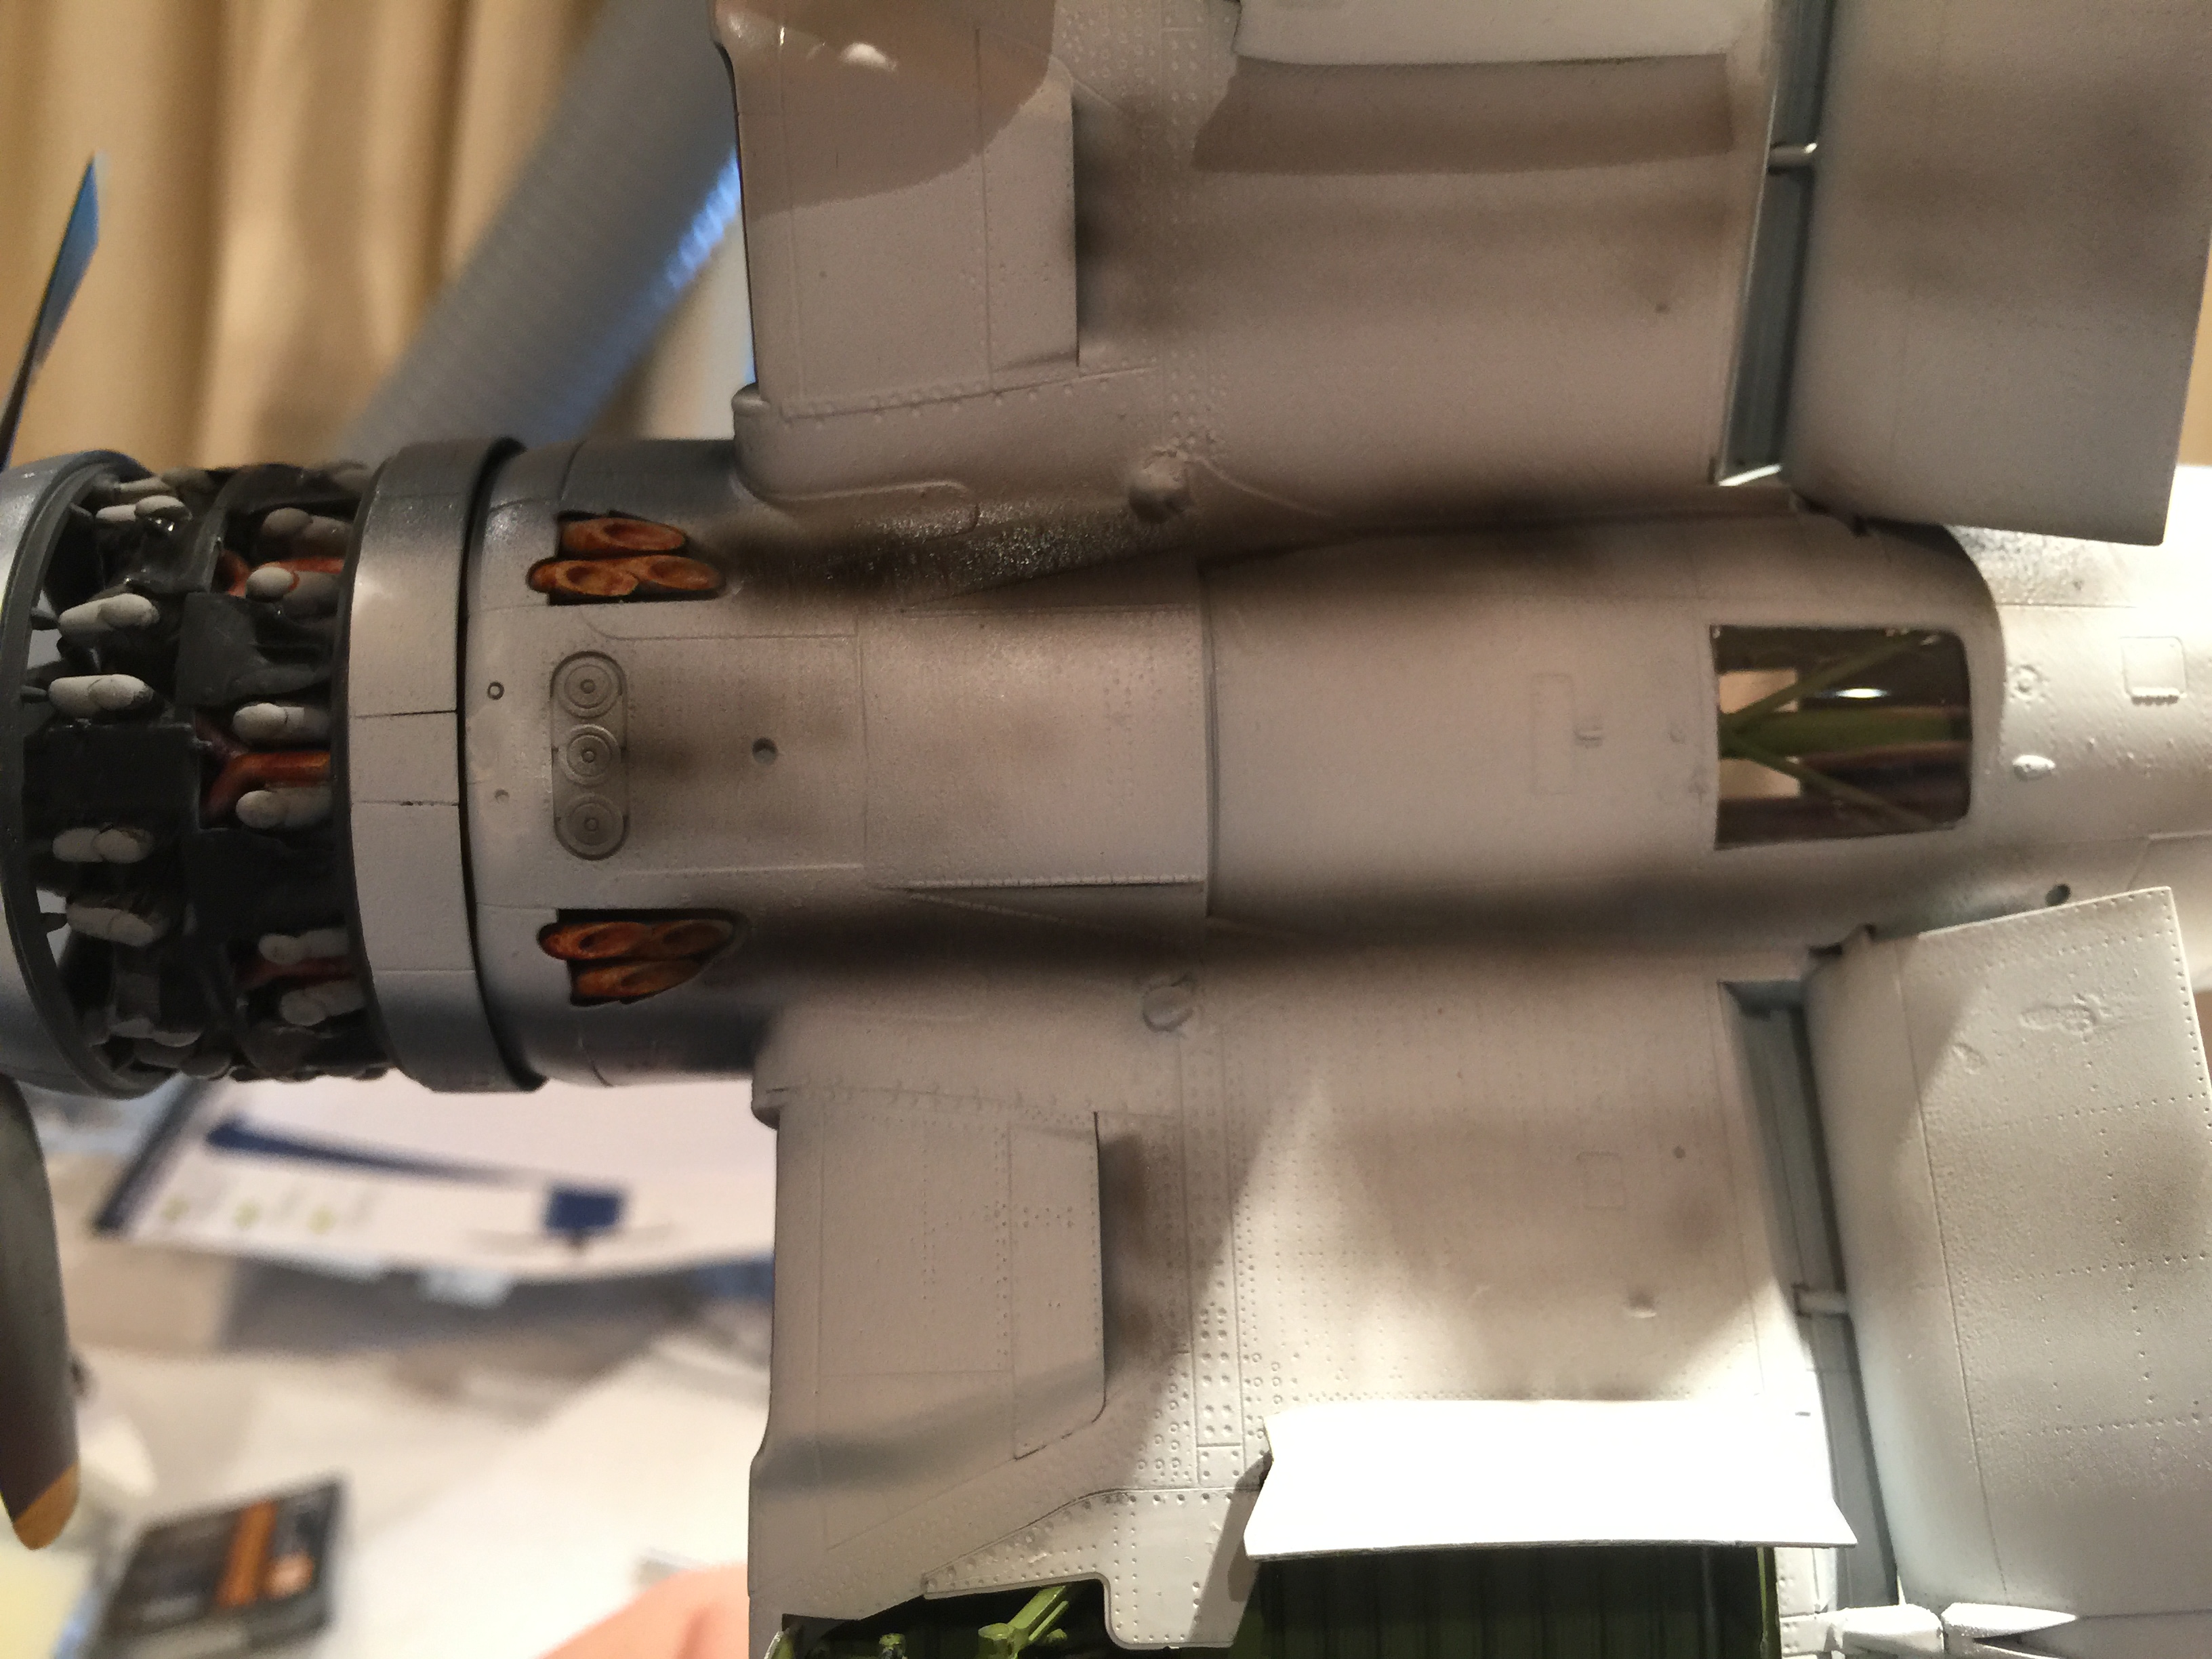
The engine covers can be opened and closed at any time
A bit of weathering using an airbrush
welcome to my tamiya corsair build. Just got the model today and started working on it. So far I have painted and assembled the front part of the cockpit. I will post part 2 tomorrow probably. This is my second model after a 2 year break from scale modelling so excuse me if I do any basic mistakes.
Today I have worked for at least five hours. I managed to get the cockpit weathered and finished. Then I painted the 2 body sides and added detail to the rear tail wheel bay. I am now stuck and need help choosing what colors to use on the painting scheme. Tamiya recommends spray cans. I want to use my airbrush.Can anyone suggest tamiya paint bottle versions of the following spray cans:
AS-8
AS-12
AS-19
AS-20
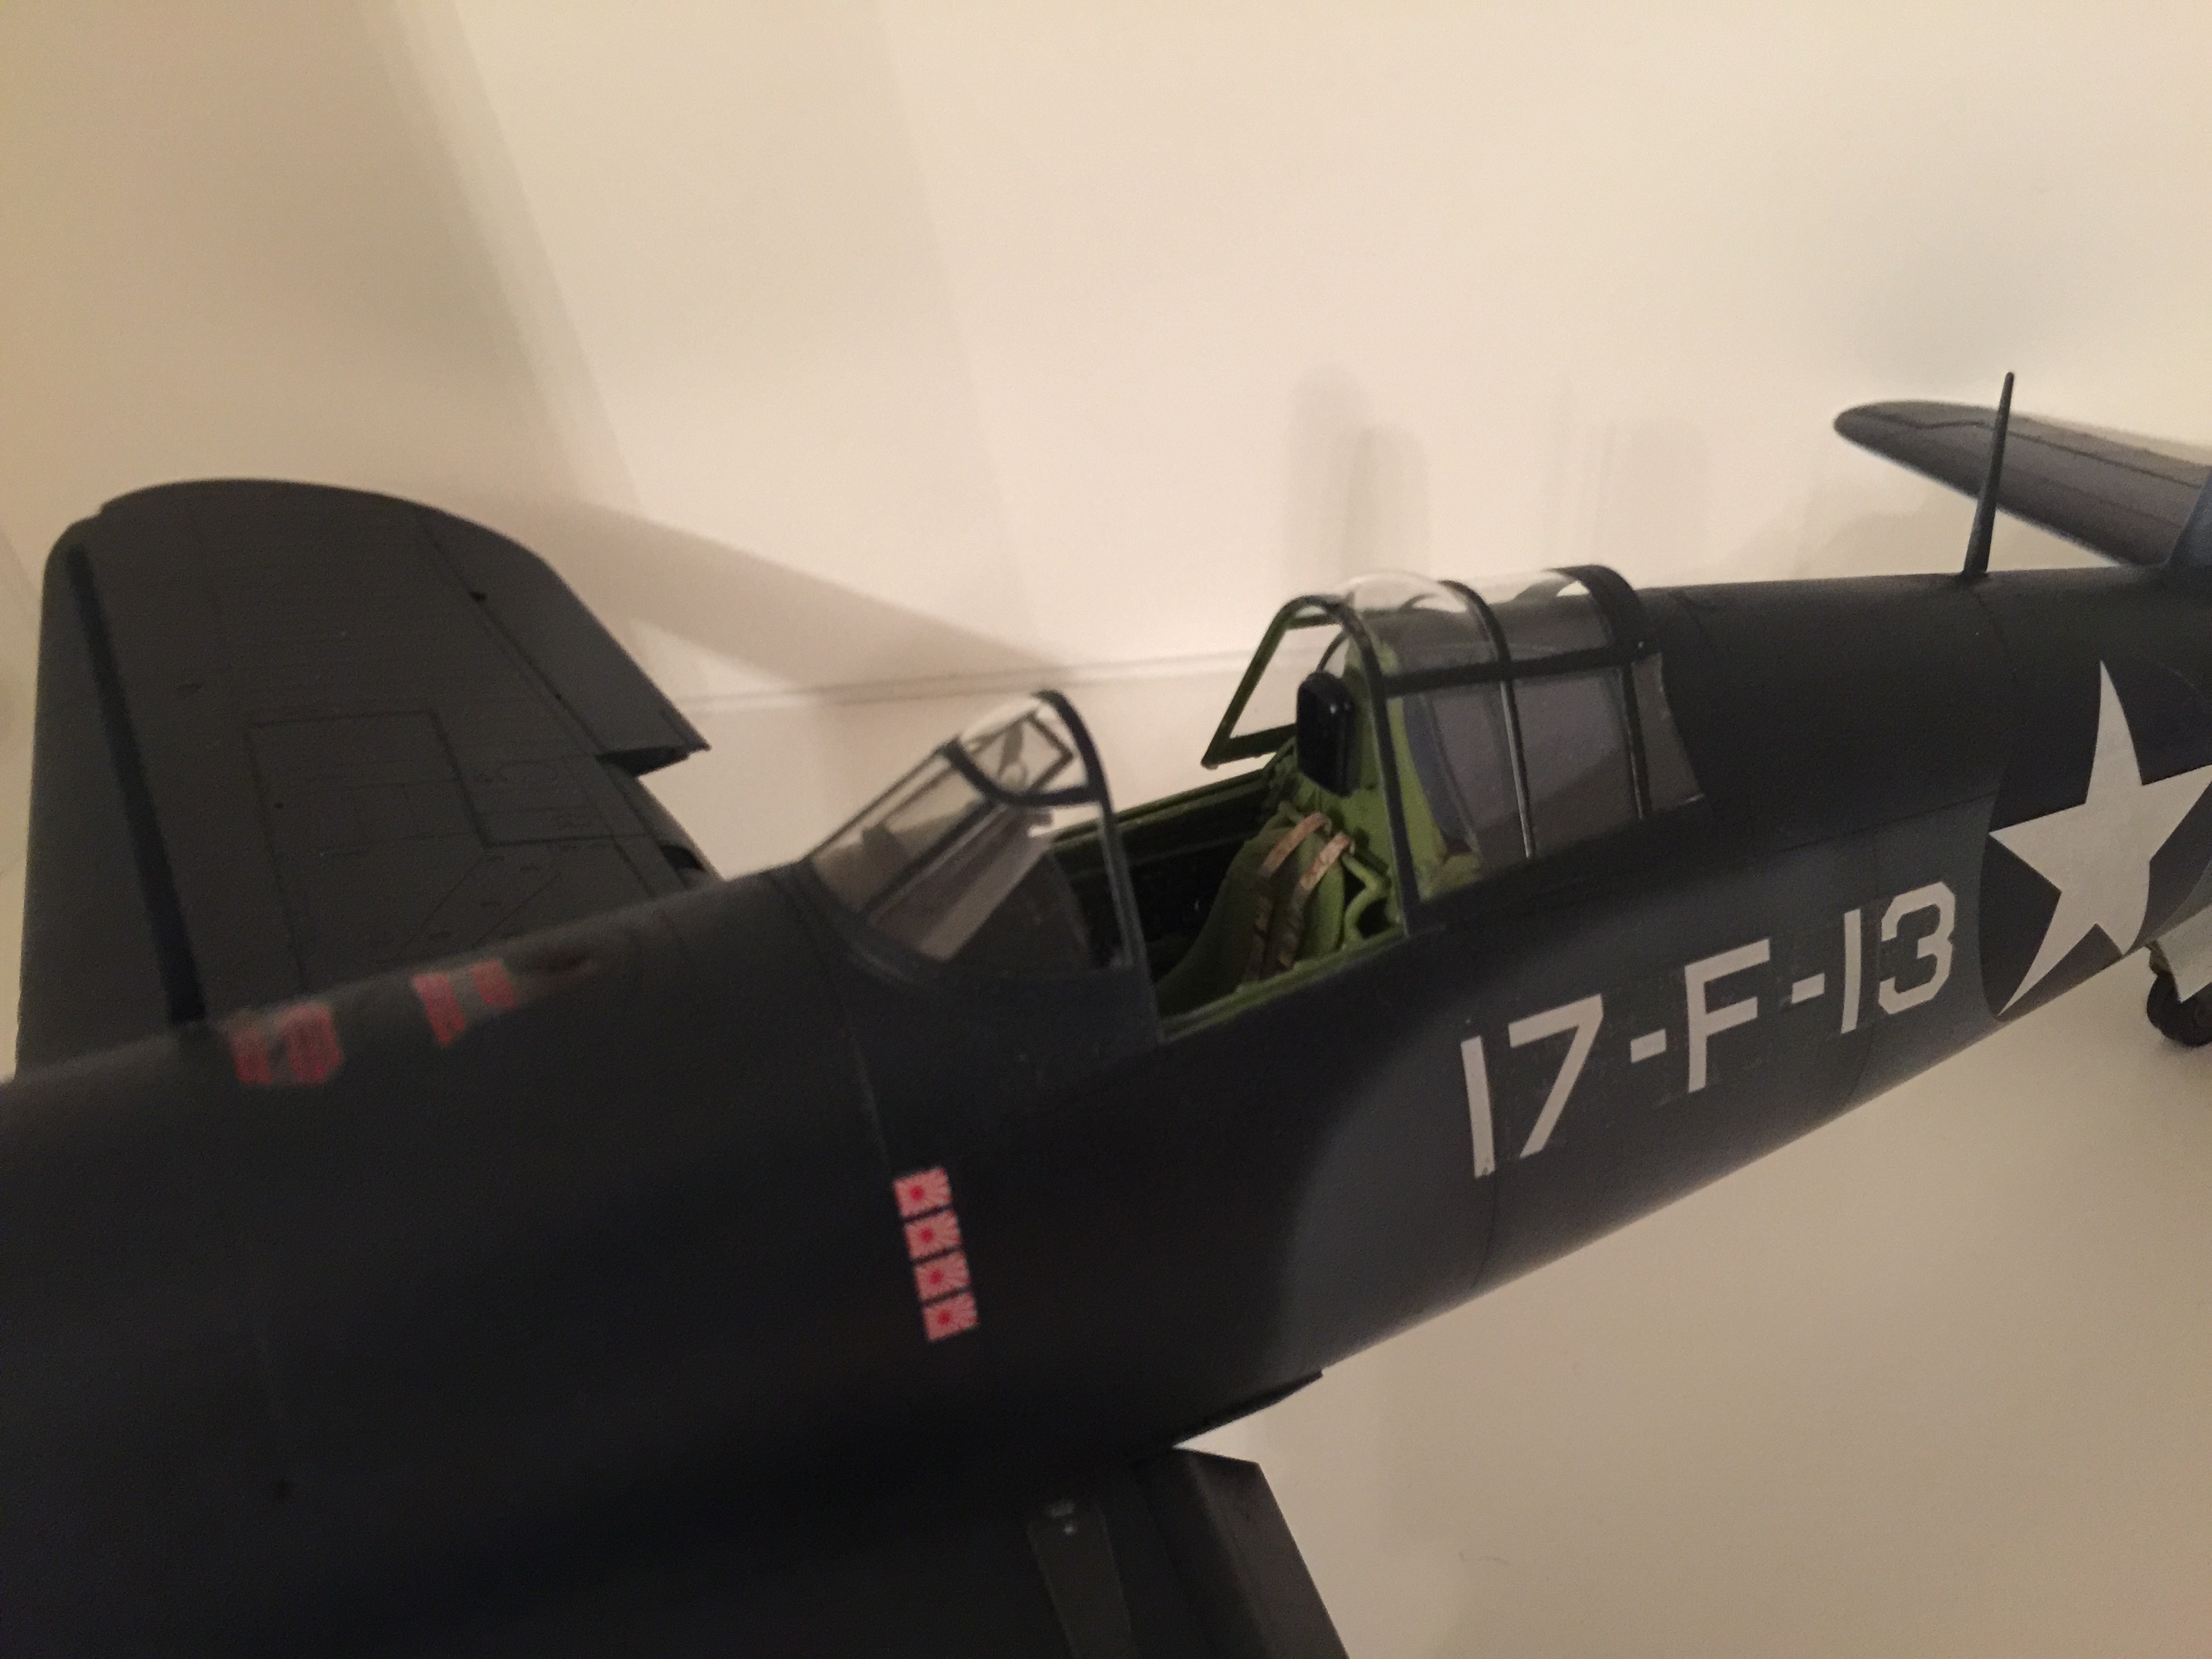
The seatbelts did not turn out well…
then I spray painted the walls of the cockpit ant the landing gear well with my 15$ no-name airbrush
Part 3 will probably come out later this week since I have school and I will only be able to work for around 30 mins/day
Managed to get a bit of work done this evening. I connected the two fuselage halves and glued on some of the panels. I also masked off the two side windows.
Hello
Got around to building a bit today. Started building and painting the engine and glued on the vertical stabilizer. I also painted the rear wheel. It’s getting too cold to go and do models in my garage so I moved into the basement. I am going to use Akan WW2 US colours as the main paint for the fuselage. Hope you guys are enjoying the build.
I added a black wash (water and XF-1 flat black) but i’m not sure if it looks good. There is also a small blue decal
Hi
I have finally finished the engine and have attached it to the fuselage and installed the cowling. I have also started working on the elevators.
please comment down below on what you think
Hello
I am halfway done with the wing assembly.
Got some new supplies!
the oil cooler
I hope to get the wings on the body by the end of this week
Hello
I have finally painted up the gear bays and attached the wings to the fuselage. Make sure to follow this thread for more updates
Hello
I managed to attach the wings to the body. I have also finished the front landing gears.
Just dry-fitting the gears in place
Started masking up some to the parts
The rubber wheels are a nice touch
Hello
a bit messy but ill fix that later
Hi
Just received the akan paints and started doing the camo.
My airbrush constantly keeps spurting water..
Unfortunately my airbrush stopped working so there will be no new updates until a new one arrives unless I fix this one.
See you next time
Ok, so I managed to get my airbrush working for a while but it stopped working again. I bought an Iwata eclipse and should be shipped to me next week.
My neat workspace…
sorry for bad focus
Hello I have applied the decals on the landing gears and the propeller. Then I coated them with alclad 2 aqua gloss.
Hello
Sorry for not posting for some time. I didn’t receive my new airbrush yet so I was working on the small things such as the prop and pilot. I applied the decals to the prop and cover it in gloss varnish using a brush.
The paint or varnish seems to have a strange glittery effect
I am going to cover this in a flat coat later
Hello,
Just got my airbrush!
Hello
I have started decalling and weathering. Instead of using decals for the black lines I masked them off and used an airbrush along with the thicker grey ones. I also used my airbrush to do the exhaust stains. Should I use tamiya TS-13 clear spray paint as a varnish?
Hello,
Most of the recalling is finally finished. The only concern I have is that the decals have a small glossy surface all around them. Will Tamiya TS-13 Clear spray paint help?
No Comments Yet